


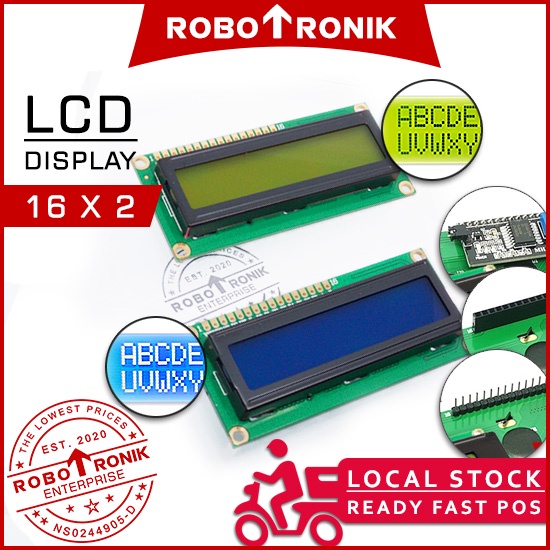


✍ Standard yellow backlight LCD for your Arduino projects, it supports 16 characters wide and 2 rows in white text on yellow background was specially developed for low-power applications. It is perfect for your handheld applications since its standard operating voltage 5V.
===========================================
▼ Features:
LCD display module with yellow / blue blacklight
Wide viewing angle and high contrast
Display construction: 16 characters x 2 line
Easily interfaced with a MCU
Low-power consumption
Widely used in copiers, fax machines, laser printers, industrial test equipment,
networking equipment such as routers and storage devices
▼ Specifications:
Number of Characters: 16 characters x 2 line
Input Voltage Range: DC 4.5V to 5.5V
Operation Voltage for LCD: 5V DC
Backlight Forward Current: 120 mA
Backlight Forward Voltage Range: 4.1 V to 4.3 V
Module Size: 80.0 x 36.0 x 13.5mm
Weight: 40g
Note: If pressure is applied to the I2C daughter board it is possible for it to bend and come contact with the LCD module. Please ensure when the LCD is installed in your application that no external object is applying pressure to the back of the module.
i2c module
For this experiment it is necessary to download and install the “Arduino I2C LCD” library. First of all, rename the existing “LiquidCrystal” library folder in your Arduino libraries folder as a backup, and proceed to the rest of the process.
Arduino Sketch:
#include <Wire.h> // Include Wire.h to control I2C
#include <LiquidCrystal_I2C.h> //Download & include the code library can be downloaded below


LiquidCrystal_I2C lcd(0x3F,2,1,0,4,5,6,7,3, POSITIVE); // Initialize LCD Display at address 0x27
void setup()
{
 lcd.begin (16,2);
}

void loop()
{
  lcd.setBacklight(HIGH); //Set Back light turn On
  lcd.setCursor(0,0); // Move cursor to 0
  lcd.print("Robotronik - TEST");
  lcd.setCursor(0,1);
  lcd.print("Ideas Comes Real");
}
If you are 100% sure that everything is okay, but you don’t see any characters on the display, try to adjust the contrast control pot of the backpack and set it a position where the characters are bright and the background does not have dirty boxes behind the characters.
Still not working?
You will need to find the I2C address by yourself by running an I2C scanner:
#include <Wire.h>

void setup() {
  Serial.begin (115200);

  // Leonardo: wait for serial port to connect
  while (!Serial) { }

  Serial.println ();
  Serial.println ("I2C scanner. Scanning ...");
  byte count = 0;

  Wire.begin();
  for (byte i = 1; i < 120; i++)
  {
    Wire.beginTransmission (i);
    if (Wire.endTransmission () == 0)
      {
      Serial.print ("Found address: ");
      Serial.print (i, DEC);
      Serial.print (" (0x");
      Serial.print (i, HEX);
      Serial.println (")");
      count++;
      delay (1);  // maybe unneeded?
      } // end of good response

  } // end of for loop

  Serial.println ("Done.");
  Serial.print ("Found ");
  Serial.print (count, DEC);
  Serial.println (" device(s).");

}  // end of setup

void loop() {}
Then open the serial monitor and select 115200 baud to get the address.
Find your sketch:
LiquidCrystal_I2C lcd(0x27,
Replace 27 to your module address.
Some change to 3F will do
LiquidCrystal_I2C lcd(0x3F,
Arduino LCD Display 16x2 Yellow / Blue Backlight Screen Serial Parallel Pateri I2C Pin Header Male Female
- Product Code: A=4-A-001+
- Availability: 678
RM8.99 ~ 9.99
- Ex Tax: RM0.00
